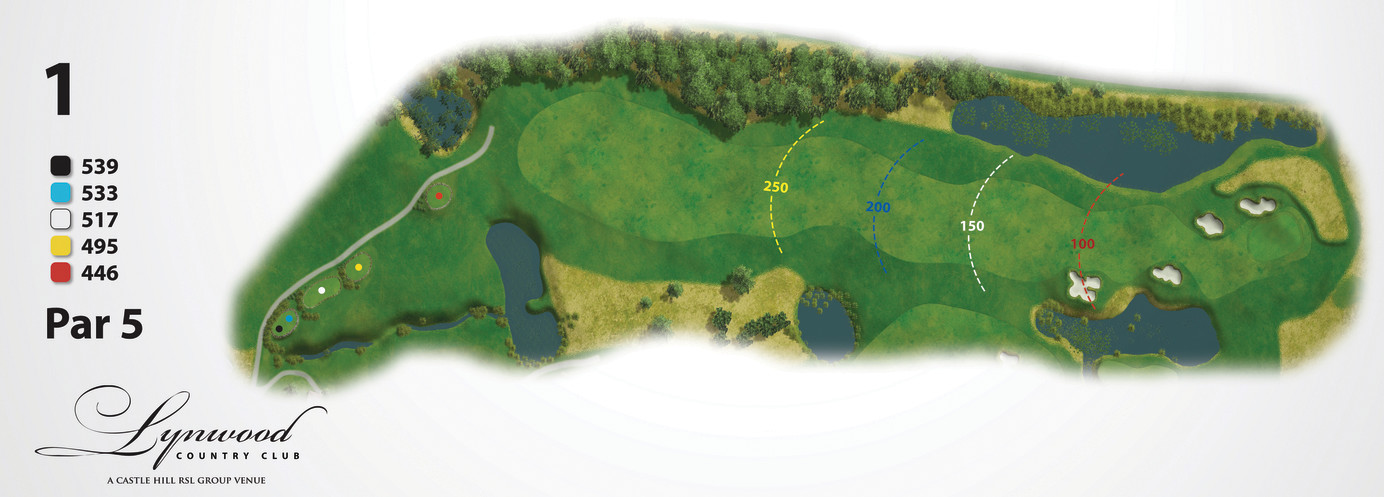
The first hole is a genuine three shot par 5 and allows play to get underway without undue challenge; a long drive down the centre of a wide fairway is all that is required. Thoughtful placement of the second shot however towards the cross bunkering short of the green can provide a much friendlier third shot depending on the daily pin position. When the flag is forward and right it is best to play from near the right side fairway trap and if the pin is left or long a shot from close to the wetland short of the green provides a better approach angle and a good chance of starting with a par.
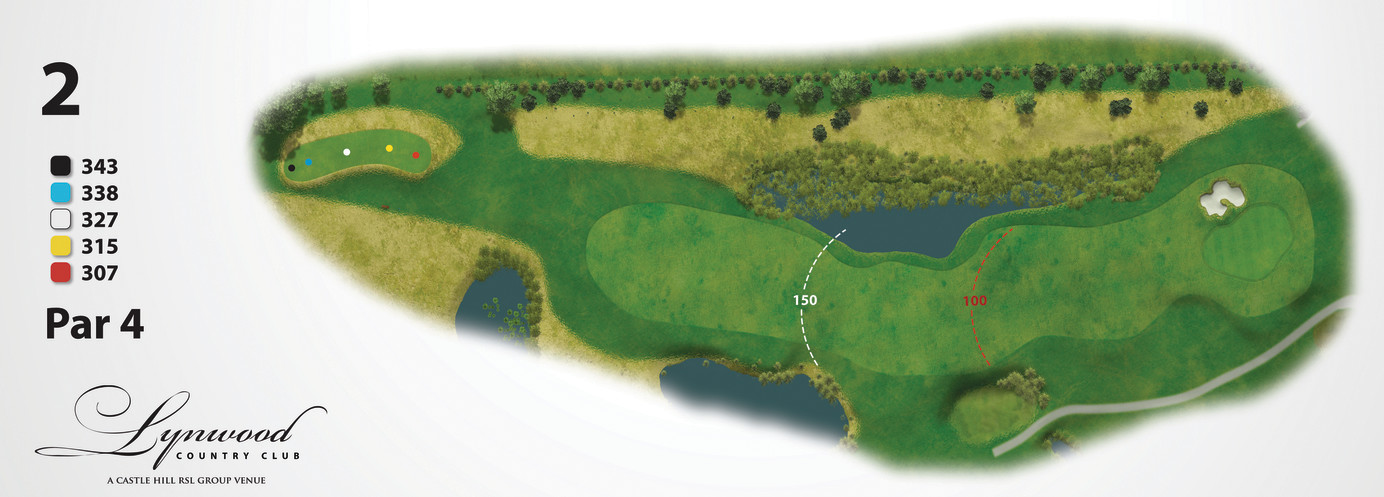
The question posed on the tee is “What club should I play into the green?” A driver on this short dogleg left will leave you with only a wedge or short iron. Playing driver however makes for a demanding tee shot on a line that avoids the wetland inside the dogleg yet doesn’t run through the fairway to a similar fate beyond the corner. This is a great position from which to attack the flag, especially if it is on the left behind the only greenside trap. A safer option may be to play a hybrid iron off the tee to the widest section of fairway and from there play for the centre of the green with a mid iron.
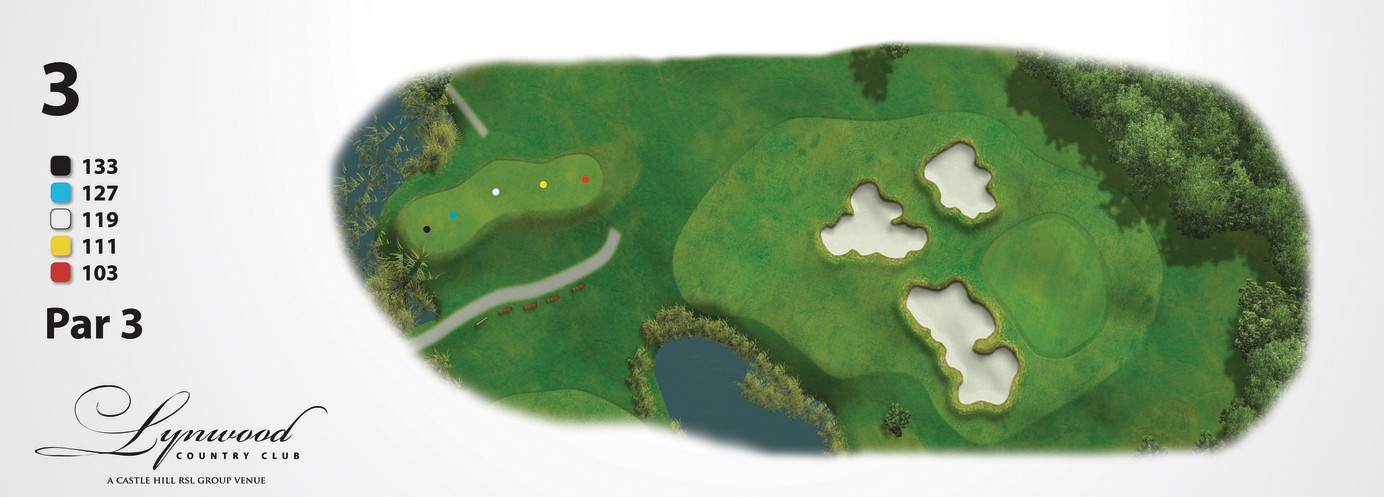
A full aerial assault is essentially the only way to find this elevated putting surface on this classic short par 3. The base of the flag is not quite visible and selecting the right club and finding the centre of the green will be a good result. Three large sand traps guard the left, front and right of the green while the grass banks drop away on all other sides making an up and down recovery shot quite a challenge.
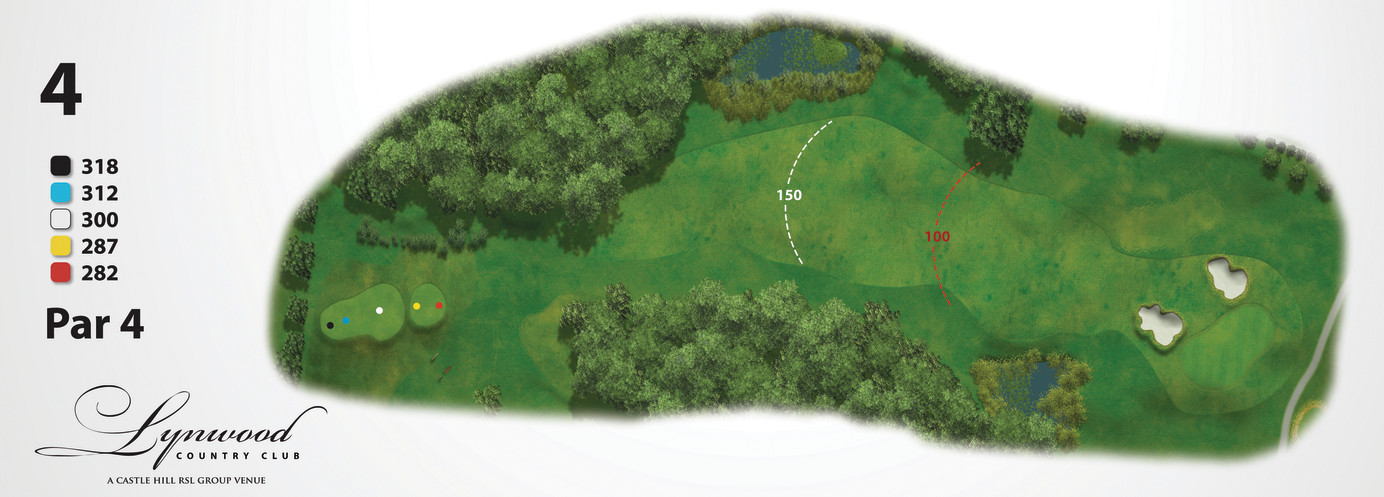
The shortest par 4 on the course should be an easy par and with a helping south easterly wind some of the big hitters may even try to drive the green. It is a small target however partly hidden by trees which create the dogleg to the right; there is also a pond to catch anything short on this line. Playing wide of the dogleg brings a trap in the front left of a shallow plateau style green into play whereas a tee shot to the right half of the fairway and reaching the corner will result in a short iron to a much deeper section of the putting surface, albeit over a central carry trap just short of the green.
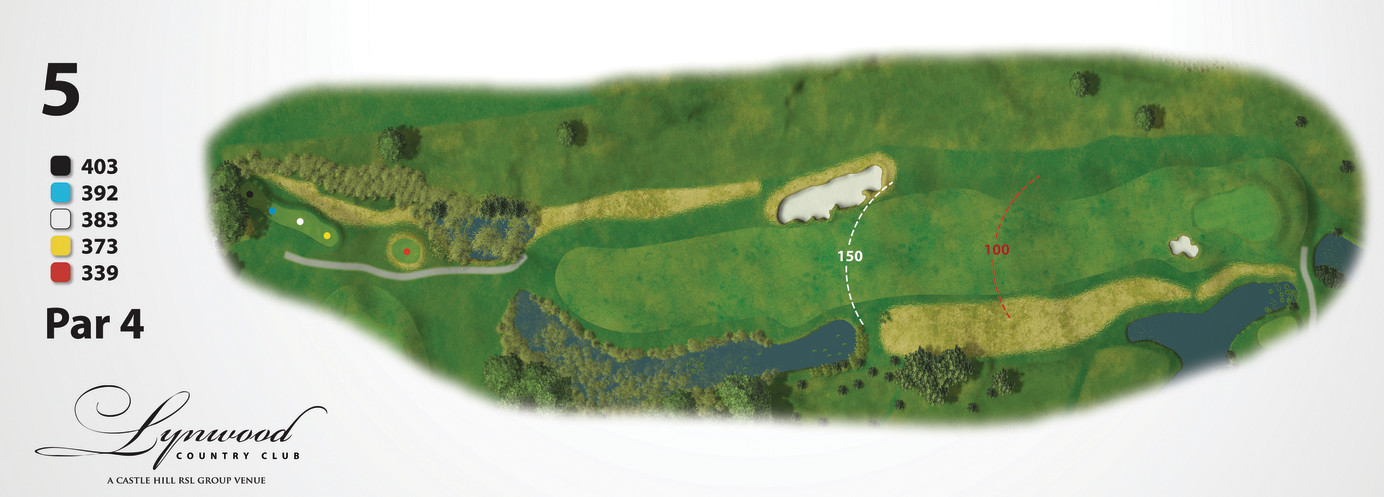
The longest par 4 on the outward nine will welcome a helping south westerly wind when it blows. The very best will play a strong draw from the tee; avoid a large sandy waste guarding the drive zone and bend slightly left following the fairway shape. From this location it would be ideal to land a strong iron or hybrid club just short of the green with a slight fade and run the ball on close to the pin. One small pot on the front right edge of this large putting surface will catch the pushed approach and test any shots coming from the right side of the fairway.
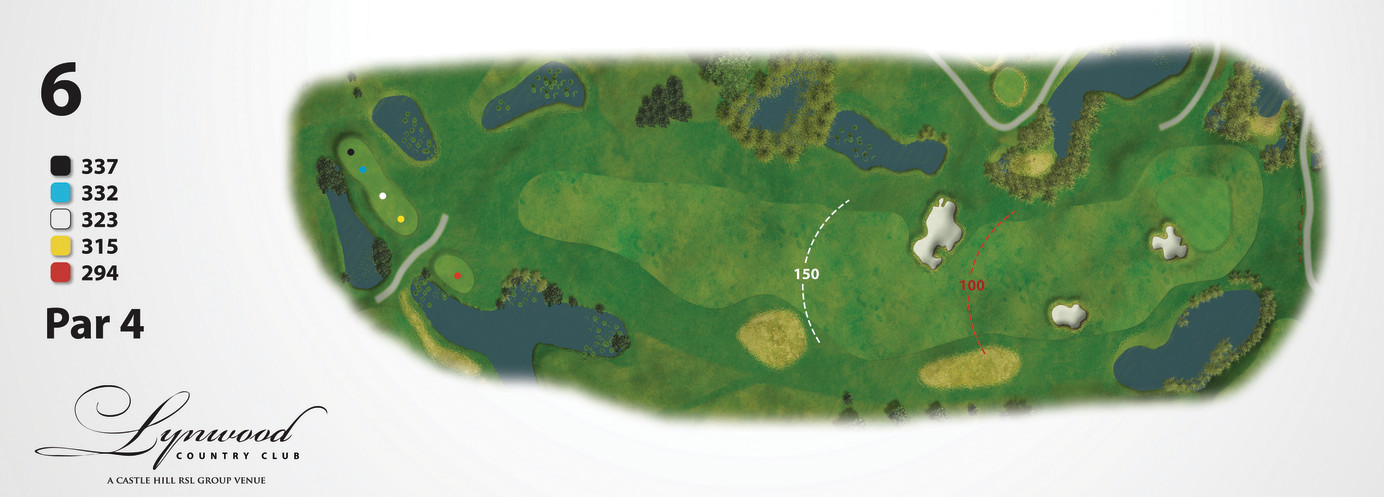
This is a simple risk for reward hole with a large sand trap on the inside of the dogleg left, there is another trap outside and beyond the corner of the fairway catching the long hitter who doesn’t carry the inside bunker. The temptation to simply layup short of this trap is tempered however because the second shot will be as much as three clubs longer and need pin point accuracy to find this modest size green with a large trap protecting the back half of its surface.
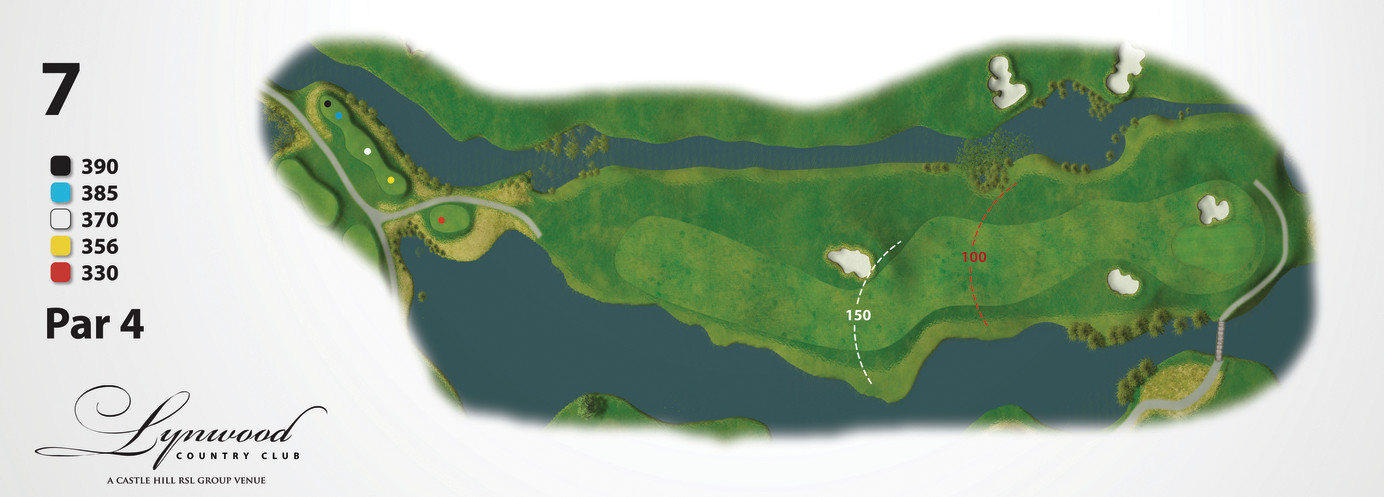
The tee shot is critical on this hole which has a deep bunker at a good drive length of about 235m. There is generous width to the right of this trap but playing to this safe side not only increases the length of second shot, it brings a right side trap short of the green well into play. Those long enough or others when playing from the forward tees can attempt to carry the fairway trap or even play to the fairway which begins to the left of this bunker. Given success with such a drive your approach to the green is wide open and accepting of a low running shot if keeping below the wind is an advantage on the day.
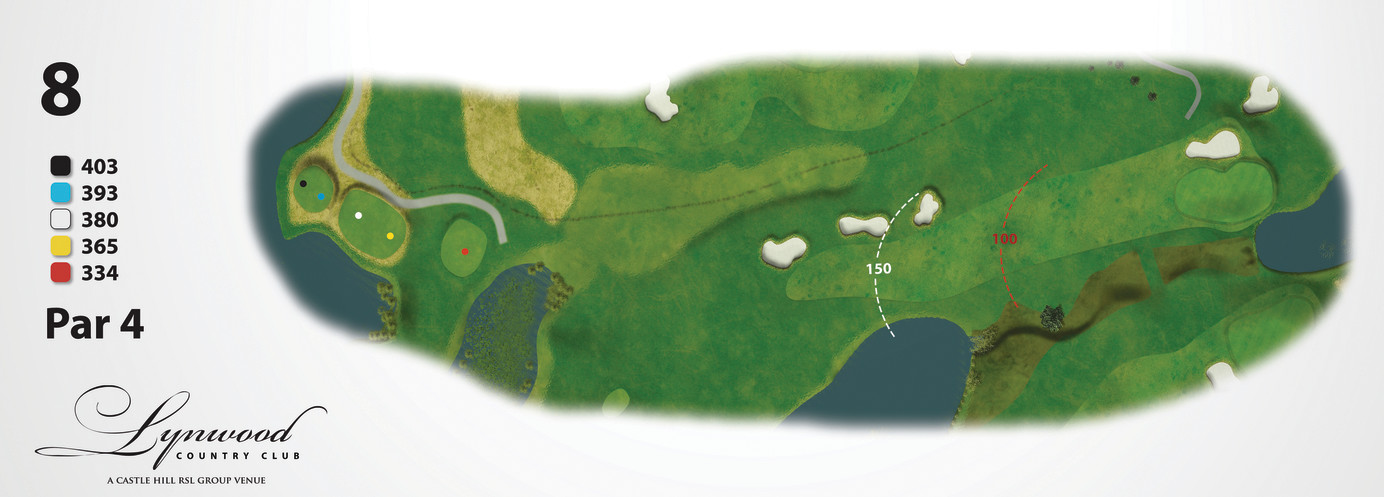
No time to stop thinking around this amazing layout and the 8th is no exception. A long dogleg right to left and playing up hill all the way. With raised tees so you can see the hole and work out the right way to play it. You will see an out of bounds area to your left and three fairway bunkers guarding the left side of the fairway as we want you to play up the fairway and not cut the corner. Going up the fairway you will see the pond to the right that comes into play with your tee shot, you do have a big generous fairway to hit too. Your second shot is up hill to a long thin green that sits back to front with hidden breaks throughout the green. Be carefully of the water on your right and the greenside bunker on your left. A par on this hole will leave you pleased with your game.
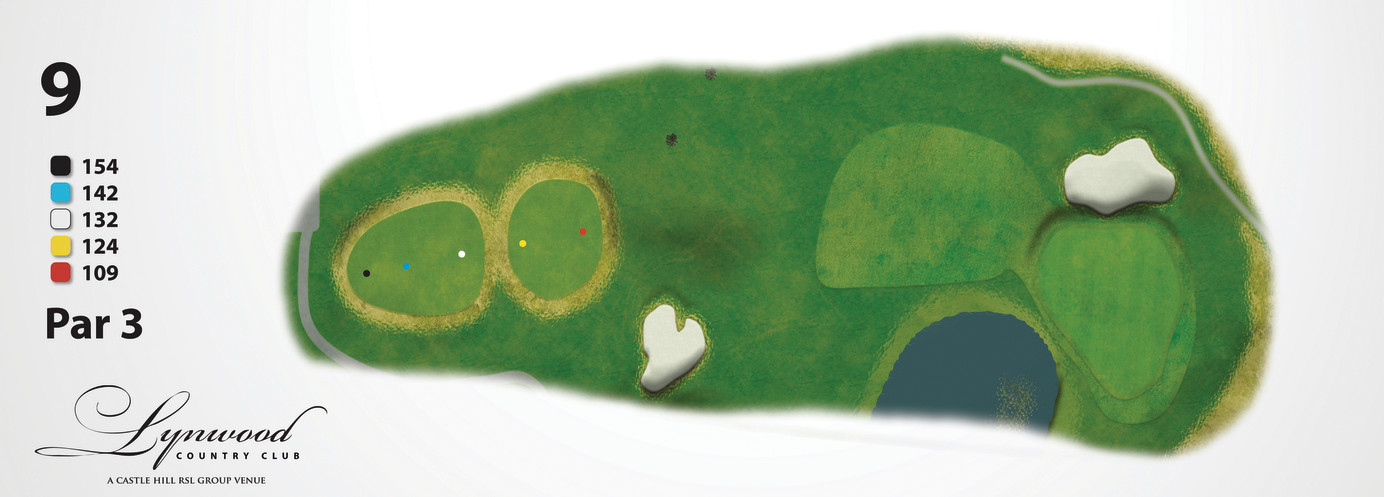
This hole requires a shot that is well struck as there is not much room for error. The tee sits on one of the highest parts of the course and looks down on the green. The green is guarded by a pond on the right that if any ball going right will run off into the water. There is well shaped bunker too the right of the green that will catch any golfers ball that wants to stay away from the water. A shot to the middle of the green will not leave you too far from any pin on this green. Not a long hole but a par will keep your confidence high for the rest of the round.
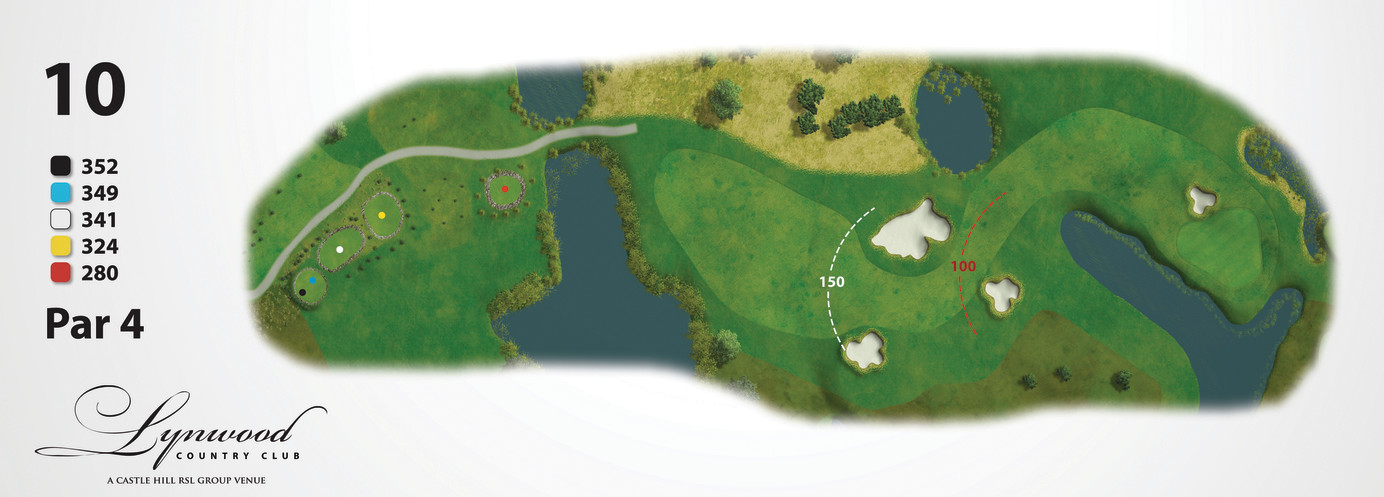
From elevated tees the prime landing area is clearly visible and well delineated by bunkers to the right and left of the fairway and another through the dogleg. The green sits on the bank of a water body which needs to be carried if the second shot is to be successful and one way of achieve this, is to place your tee shot between the right and long bunkers from where you have a clear shot into the deepest central section of this small green. Whilst playing to the left side of the fairway shortens the hole and to some extent reduces the amount of water carry it brings the pot bunker situated off the front, left corner of the green into contention.
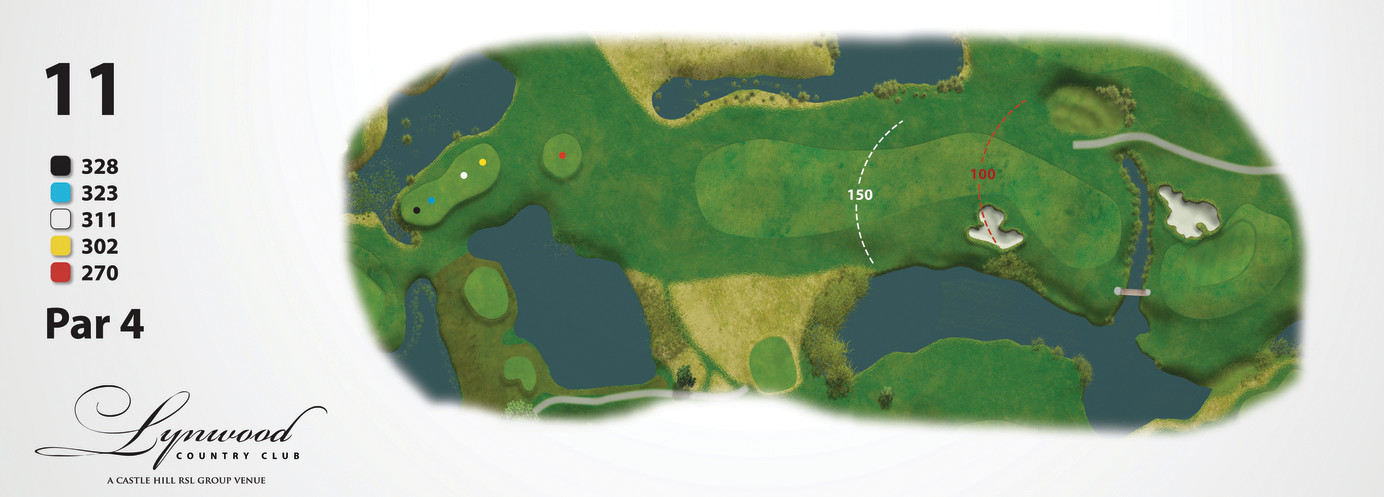
This is a simple risk for reward dogleg to the right, playing as close as one dares to the large trap on the right side of the fairway lessens the demand on your approach shot to the green. A small green, with a large bunker hiding the back left half of the putting surface and a small creek crossing the fairway in front, is oriented to take a shot from this direction and provide a good birdie opportunity.
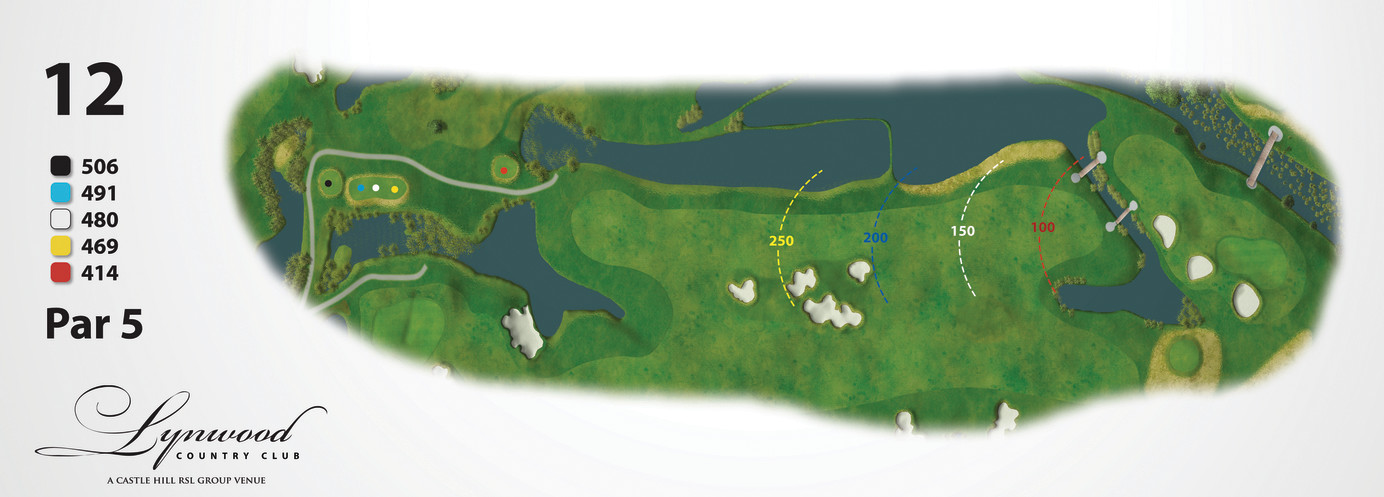
With wetlands running the full length of the left side of the fairway and a series of bunkers down the right this is a picturesque yet demanding hole. The further your drive the tighter the landing area however if a long straight drive is successful it opens the possibility of carrying a narrow creek running diagonally across the fairway well short of the green. A successful carry with the second shot in turn provides an unimpeded pitch shot down the length of the green for the third shot. Anything less than two great shots will certainly leave you short of the creek and having to negotiate three penal traps enroute to the putting surface.
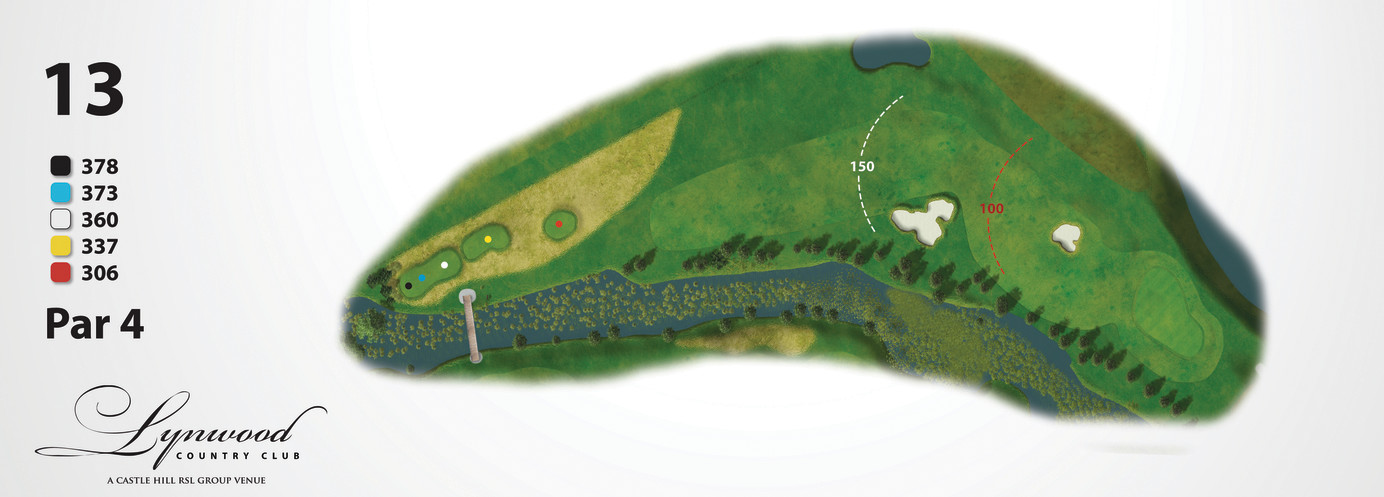
A sharp dogleg to the right plays around a “beach style” bunker on the corner of the wetland, which runs along the right side of the fairway. Although a drive carrying this bunker is a very demanding shot it will yield tremendous advantage when playing your second to the elevated green with most of its surface out of view. Tee shots playing wide of the dogleg not only face a longer approach shot but must carry a trap on the cross slope well short of the green and need to be perfect or lucky to find and stay on the putting surface. A par will be a good result on this hole.
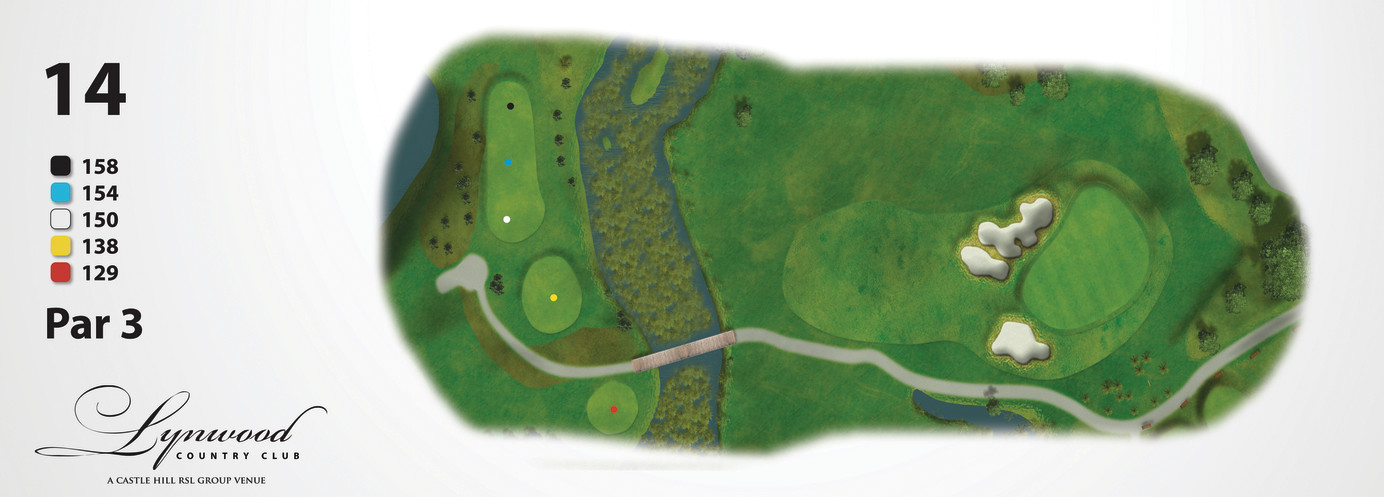
Standing on the tee, the green is about 3m below your feet on the other side of the valley, providing full view of the putting surface and three menacing traps that guard it. There are three pin zones varying in difficulty from front to back and although the rear is more demanding it offers some potential to slightly over club and come down off the bank at the back of the green. This is a “post card” hole and regardless of the flag location, par or better here will provide pleasant and lasting memories.
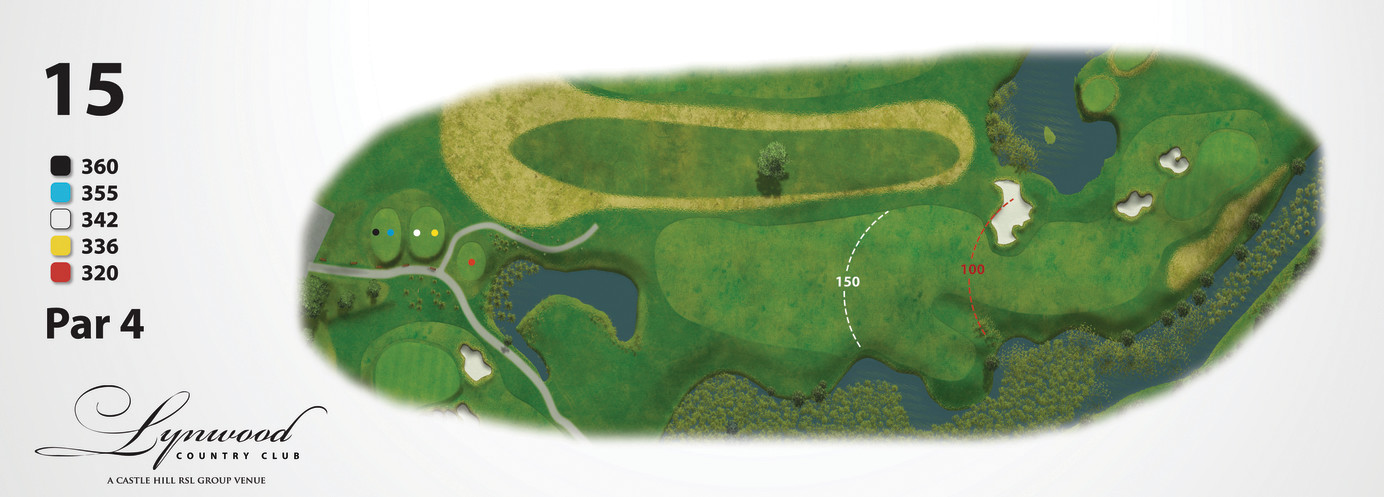
Players on this elevated tee face at least two options depending on their proficiency. The very good long player should attempt to run a shot past the bunker on the left and if long enough it will open up the green to a shot from this location. An alternative is to play a solid drive down the right side of the fairway and finishing just short of the wetland beyond the dogleg. From here the line in to the green is quite open albeit three or four clubs longer. A modest drive to the left side will shorten the approach shot however it will not only need to clear the fairway trap but two green side bunkers as well. Holding the green from this direction is much more of a challenge.
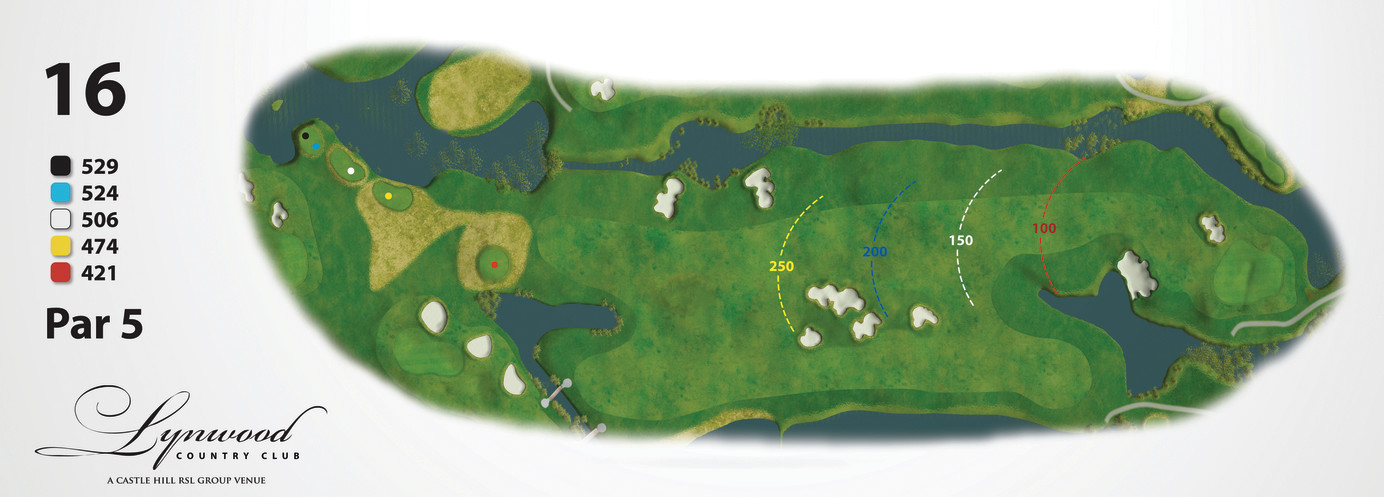
This strong par 5 has a number of bunkers both to the left and right of the fairway which must be negotiated enroute to a large elevated green. Combined with the 12th hole these holes create the only adjoining parallel fairways and thus provide some respite in terms of driving accuracy. Providing you stay in play it is placement of the second shot that is key to success on this hole. The degree of challenge increases the closer one gets to the green which makes laying up short of the small pond with a huge “beach style” bunker on the right of the fairway a good prospect. Although from here the beach bunker obviously needs to be carried and many humps and hollows and another trap to the left of the green must be negotiated, a well played lob wedge to the centre of the generous sized green will be rewarded. Missing left, right or long will result in a lengthy pitch return.
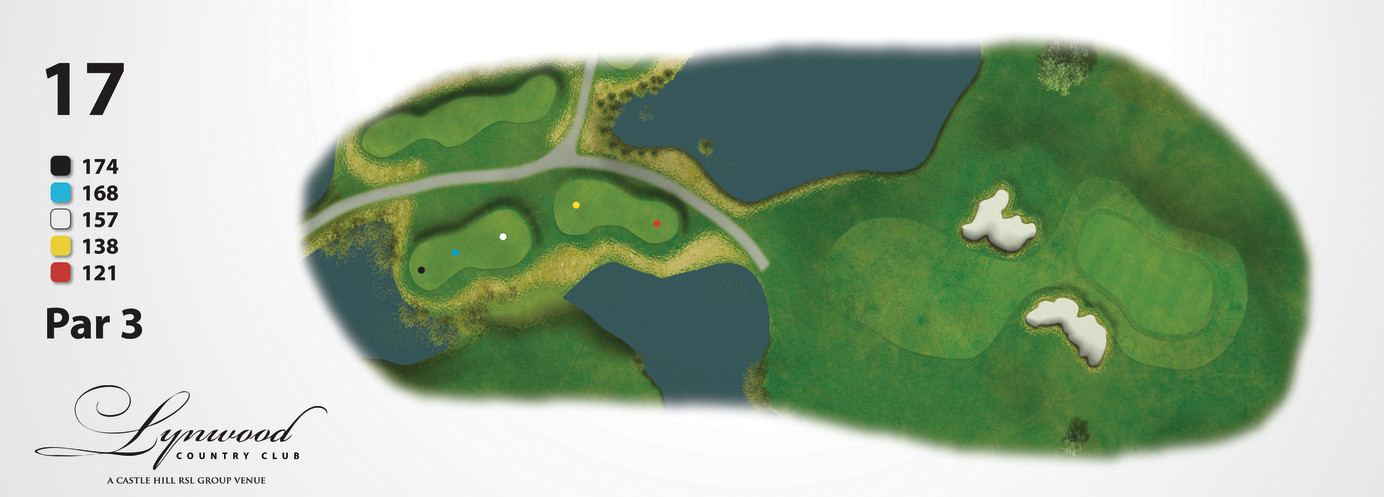
A generous putting area runs diagonally across the line of play from front left to rear right and sits just beyond a ridge making depth and club selection quite deceiving. There are two large and penal bunkers cut into the ridge and a good shot bisecting the traps should find the front edge of the green. When the flag is in the centre or rear location the right side trap comes very much into play and must be carried by the correct distance to reach the flag and stay on the short cut grass.
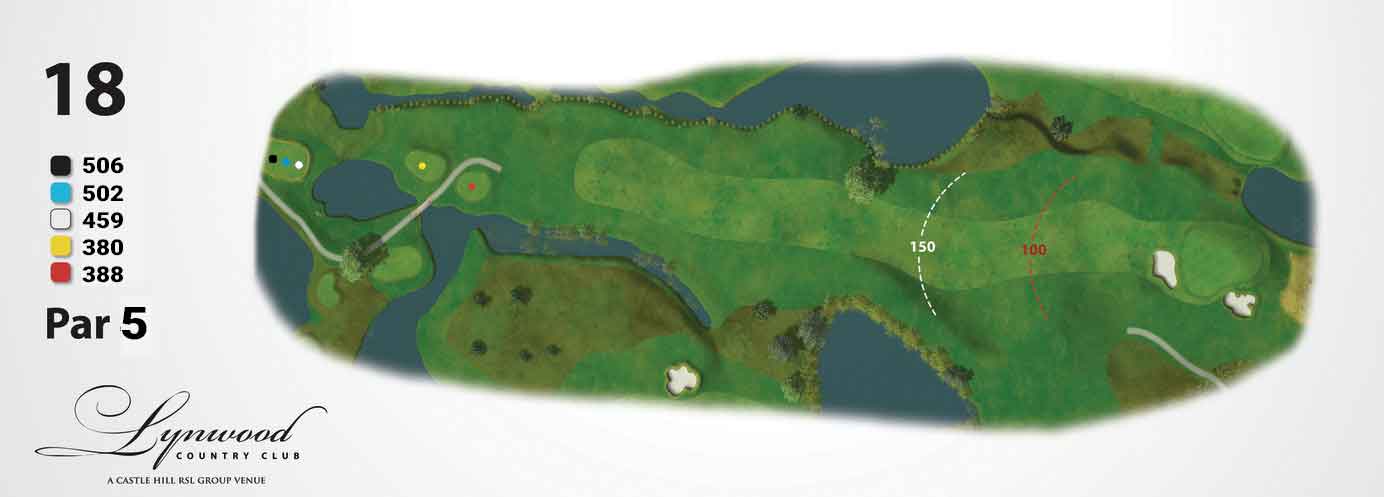
Not a long par five from the white tees only measuring 459m, provided you navigate a somewhat tight tee shot with hazards on both sides and can also avoid the large gum tree on the left side of the fairway, you will be rewarded with an easy lay-up, or if you’re long enough you may attempt to get home in two shots on our signature par 5 finishing hole. After you get around the tree you will see a raised green that is protected by a deep bunker at the front right of the green that swallows up any shots that come up short. A large green that runs from back to front that will test your long putts. You will expect a par or a birdie on this hole, but do not be too surprised if you walk off with a bogey.